Sunday, April 26, 2015

Chocolate Covered Strawberry Bundt Cake

Chocolate Covered Strawberry Bundt Cake


It is hard to believe that I am 1/4 of the way through the year and 52 cakes.  As I am planning out which cakes to make it is getting trickier. It seems that cakes are just variations on a few basics. I guess it is time to get creative.

 So what makes a cake a cake? How is a cake different from bars or quick bread? One time I stacked Pumpkin Bars into an adorable cake by adding some simple decorations and the Cinnamon Bundt Cake can be made in bread pans as a quick bread. So this week instead of looking in my recipe box under cakes, I looked under quick breads. The answer … Strawberry Bread!

Of course to get elevated from a quick bread to a cake it has to get dressed up and be pretty.  After all, cake is the princess of desserts. It has the wow power that other desserts just don’t have.  This is why there are so many fancy cake plates. Made in a bundt pan, placed on a fancy cake plate, topped with chocolate ganache and strawberry bread became Cinderella.


Chocolate Covered Strawberry Bundt Cake
Skill Level: Easy and Quick
Cake Ingredients:
3 c.
Flour
1 tsp.
Baking Soda
1 tsp.
Salt
1 tsp.
Vanilla
20 oz.
Frozen Sweetened Strawberries (thawed and chopped))
1 c
Oil
1 tsp.
Red Food Coloring (optional but makes it prettier)
Preheat oven to 350 degrees and grease and flour a bundt pan (Brush with shortening then put ¼ cup flour in the pan and swirl it around. Tap pan on counter to remove loose flour) 
Measure dry ingredients into bowl. Crack eggs into a large measuring bowl and beat with a whisk. Add oil, food coloring and strawberries and blend then add to flour mixture. Stir well by hand then pour into prepared bundt pan. Bake for 60 minutes or until toothpick comes out clean and put on cooling rack. Wait 8 minutes then turn cake over on rack and out of pan to cool completely. Don’t lose track of time or the cake will become to cool and will not release from the pan. If times get away from you, put the cake back in the semi-warm oven for a couple minutes then turn it out on a cooling rack. As the cake is cooling, prepare ganache and let it cool to desired consistency.


Chocolate Ganache (Glaze)
1 c.
Heavy Whipping Cream
8 oz.
Semi-Sweet Chocolate Chips (1 1/3 c.)
Put cream in a small saucepan and heat over medium temperature until bubbles form along the edge of pan. Be careful not to overheat. If you have a thermometer it will be about 160 degrees. Add the chocolate chips or any chopped chocolate of your choice and swirl the pan to cover chocolate with hot cream. Cover pan with lid and wait 8 minutes before you stir so the chocolate has a chance to melt. Whisk chocolate and cream until smooth then let the mixture sit until about 20 minutes until it is a glaze consistency. It should flow from a spoon but hold its shape. Spoon over cake, allowing ganache to flow down the sides into the crevices of the bundt shape. If it becomes too thick, warm it for 10 seconds in the microwave. Store cake in the refrigerator and if possible make it a couple days ahead and since the flavor gets richer each day. For even more decadence, arrange chocolate dipped strawberries around cake the day it will be served


*If you have leftover chocolate ganache, it can be used as a strawberry dip, stirred into milk for hot chocolate, or eaten with a spoon.


Source: My recipe box


Coke Zero Chocolate Cake

Heart Healthy Coke Zero Chocolate with Cherries and Whipped Cream

This cake is so easy it feels wrong to say there is a recipe. There are 4 ingredients in the entire cake including the toppings.  After several weeks of calories, I mean cakes; it might be time for a healthier option. Best of all, you won’t even notice the lack of calories. Happy Heart Health Month!

1 box Chocolate Cake Mix 
12 oz. Coke Zero
1 can  Cherry Pie filling or better yet use sliced strawberries to save calories
Whipped Topping

Using a whisk, mix cake mix and Coke Zero (pop for us Minnesotans or soda for those of you further south) Put mixture in a 9x13 inch cake pan that has been sprayed with cooking spray. Bake at 350 degrees for about 25 minutes. (Subtract 5 minutes from the time on the box) Cool completely before cutting or assembling in the ways shown below. For the fewest calories, serve with fresh strawberries and light cool whip.

This cake is very moist but is also fragile so would not hold up with a heavy frosting on it. Also, it might be the sugar-free pop or the lack of oil but this cake tastes best cold and is not good warm. 


Cut cake into cubes and layer in a clear bowl,


put cake cubes in a small mason jar for individual servings
or get fancy and use a champagne flute.

  Source: I have no idea, but whoever came up with it is brilliant.


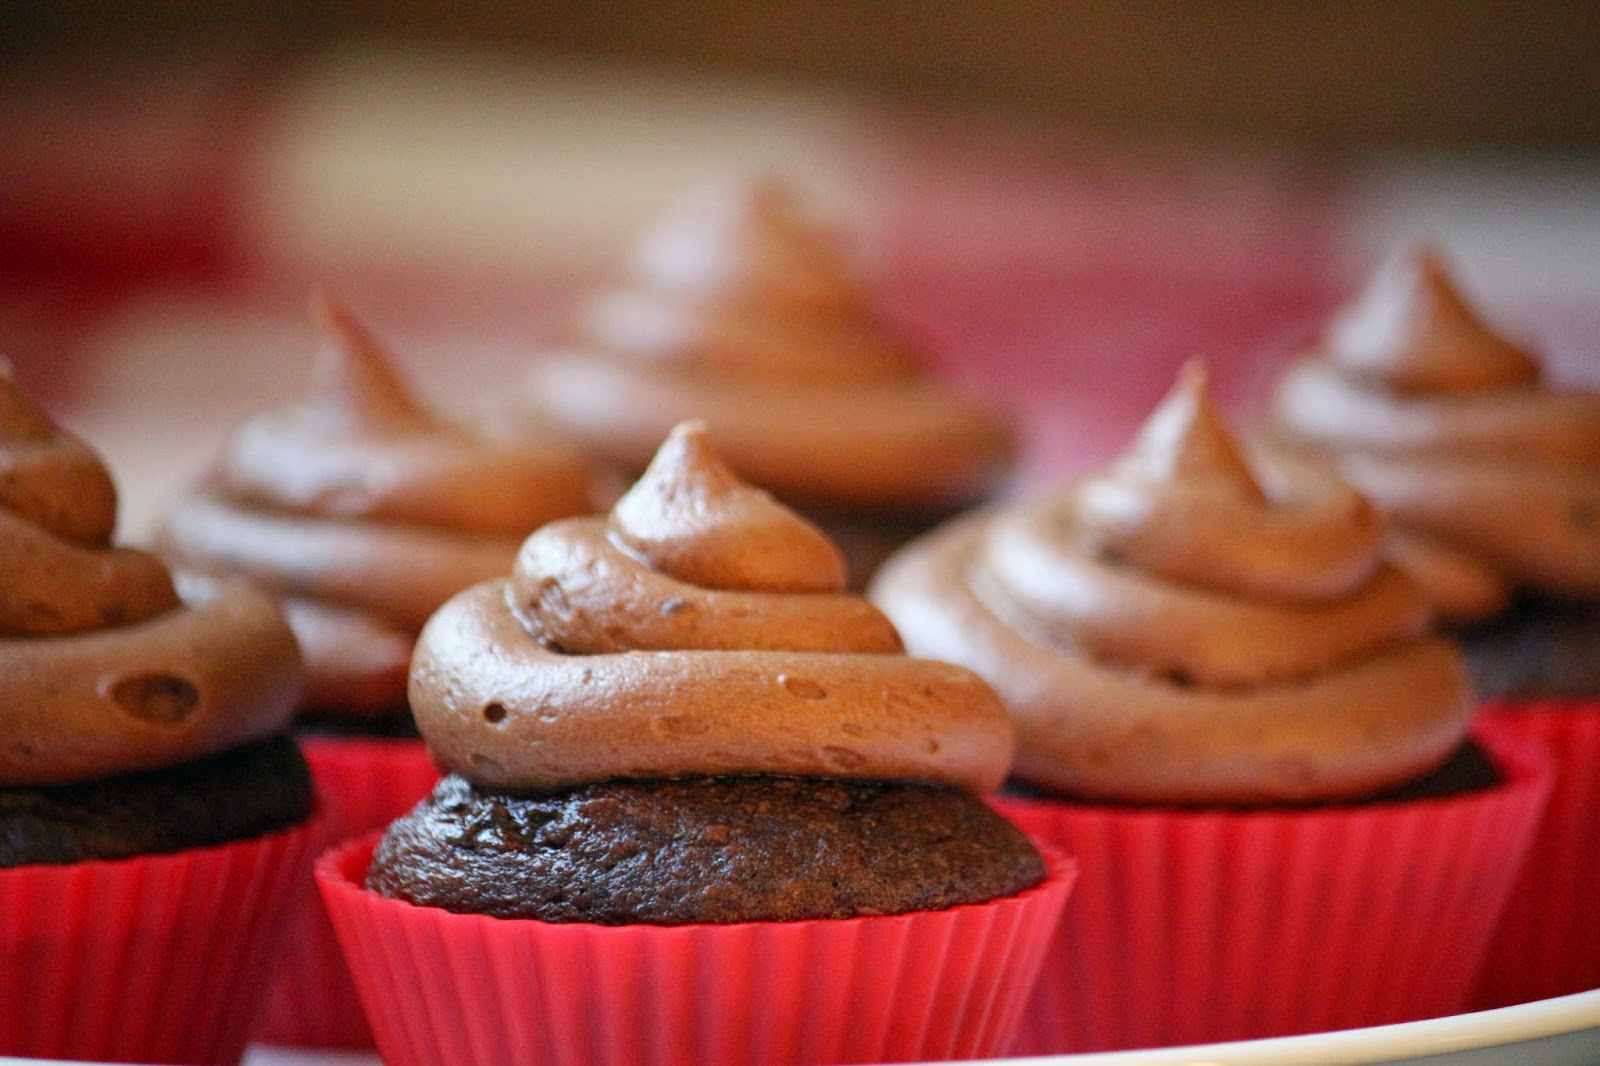
Cherry Chocolate Cupcakes with Chocolate Buttercream Frosting

 Everyone loves getting oohs and aahs for recipes that are easy and quick. These cupcakes are one of those recipes. I like using silicone cupcake liners because they are bright and reusable. However it is tricky to give the cupcakes away and the liners are difficult to wash.

The heart designs are made with Candy Melts, a product made by Wilton available at craft stores. Candy Melts are similar to almond bark or white chocolate chips except they come in several colors. Don’t be tempted to just add food color to white chocolate chips or almond bark because most food color contains water. Chocolate and water definitely do not mix!

There is no oil in this cake making it lower in fat however the cherry pie filling makes up for the calories.

Cherry Chocolate Cupcakes with Chocolate Buttercream Frosting
Cake:
1 box Chocolate Cake Mix
3 eggs
1 can  Cherry Pie filling

Stir with a spoon until blended. Fill 24 cupcake liners with batter and bake at 350 degrees for about 20 minutes or until a toothpick comes out clean. Cool on a wire cooling rack.

Frosting:
1 c.
Butter
2 tsp.
Vanilla
4 TBSP
Cocoa Powder
4 c.
Powdered Sugar
3 TBSP
Milk or Cream

Beat butter and vanilla with mixer until smooth. Sift cocoa and powdered sugar together and add to the butter mixture. Beat on low then add milk a little at a time until it is a medium consistency. It should hold its shape but still be easy to spread. Put icing into a cake decorating bag and pipe onto cupcakes.

I wonder what happens if the cupcake sees its shadow. Way more interesting than a groundhog!


The hearts are made using product made by Wilton called Candy Melts. After they are melted and put in a small zip lock bag, you pipe onto parchment paper just like you are drawing hearts on paper.
  
To Decorate:  Melt candy melts in a microwave safe bowl according to package. Stir until smooth then put into a small disposable bag. Snip the corner and create heart designs onto parchment paper. When they have hardened, peel them off and use to decorate cupcakes. This is also what I used to write “I love cakes” on my first post.

Source: Mom’s recipe box


Hot Fudge Sundae Cake


Comfort food usually refers to things like macaroni and cheese or mashed potatoes. But this cake is what I call "comfort food." It is perfect for those times when you need something sweet but don’t want to spend time in the kitchen. During a long commercial break with ingredients in your cupboard you can have a gooey-chocolaty cake baking in the oven.  Hot Fudge Sundae Cake may not be the prettiest cake but when you want something hot, sweet and chocolate this is it! There is not even a bowl to wash! 
 

Hot Fudge Sundae Cake
Skill Level:  Easy and quick
Preheat oven to 350 degrees.
1 c.
Flour
¾ c.
Sugar
2 TBSP
Baking Cocoa
2 tsp.
Baking powder
¼ tsp.
Salt
½ c.
Milk
2 TBSP
Oil
1 tsp.
Vanilla
1 c.
Brown Sugar
2 TBSP
Baking Cocoa (total of ¼ c. total)
1 ¾ c.
Hot water

Put the first 5 (dry) ingredients in a ungreased 9 x 9 inch pan. Measure and mix the next 3 (liquid) ingredients in a measuring cup. Pour over dry ingredients and blend with a fork. Mix the brown sugar and remaining cocoa before sprinkling over the batter. Pour hot tap water over mixture and put it in the oven. Bake for 35-40 minutes. Cake will be firm to touch and sauce will be bubbling up from the bottom. Cool 5 minutes then put a spoonful of cake alongside a scoop of ice cream spooning the sauce over the ice cream. To take it over the top, add whipped cream and sprinkles. No restaurant dessert can come close to this one!

Notice the ceramic baking dish? It is made by Chantal which I bought because it was close to my daughter Chantel's name (and because this red color was on clearance after Valentine's Day.) I now have several because things bake evenly without over-baking the edges. I think the key is the unglazed bottom which allows air to circulate eliminating soggy crusts. 


Source: High School Home Ec. Class


Saturday, April 11, 2015

Apple Cake with Real Whipped Cream


This week was my husband's birthday and my plan was to make his yearly German Chocolate cake with Caramel Coconut icing. Time for a confession... I've never made that cake from scratch. I have always been afraid to risk it not being as good as the cake from a box with the icing from a tub. Seriously, who am I to compete with Betty Crocker? But this is the year I am making 52 cakes so I was all set to ditch the box and make the real thing.  But after eating chocolate, coconut Bunny Cake most of last week, he said he wanted an apple cake instead. The German Chocolate will have to wait until another week.... maybe the week of our anniversary. 

This cake is so simple it didn't seem to warrant birthday status, but with a sprinkling of powdered sugar and real whipped cream this cake was every bit as special as he is.

I just drew the numbers on a doily cut them out. Easiest cake ever to decorate!
 Apple Cake with Whipped Cream
      Skill Level:  Easy and quick
3 c.
Flour
2 c.
Sugar
1 c.
Oil
1 tsp.
Baking soda
1 tsp.
Salt
2 tsp.
Vanilla
3
Eggs
3 c.
Apples peeled and diced
1 c.
Walnuts chopped
½ c.
Raisins (soaked in hot water to soften then drained)
½ c.
Powdered Sugar for dusting the top

Preheat oven to 325 degrees. Grease and flour 2 square cake pans 8” each. I used 1 square cake pan and made the rest into 6 jumbo muffins because they are easier to share or freeze. Put the first 7 ingredients into a mixer bowl and mix on low until blended. Scrape the sides of bowl and beat on medium for 3 more minutes. By hand stir in the apples, nuts and raisins. The batter will be thick, more like muffin batter. Divide the batter into the prepared pans and bake 40 minutes for jumbo muffins, 60 minutes for the 8” square pan or until it is firm to the touch and a toothpick comes out clean. Put on wire racks to cool 10 minutes. If you are removing it from the pan do this while   it is still warm or it will stick. Dust top with powdered sugar. Serve with real whipped cream. This cake gets better each day and will keep several days in the refrigerator. Put the powdered sugar on the cake just before you serve it or it will dissolve and disappear. 

Whipped Cream:
1 c.
Heavy Whipping Cream
2 TBSP
Sugar
1 tsp.
Vanilla
Beaters and bowl in refrigerator for 1 hour to chill. Whip the cream on medium until soft peaks form. Add the sugar and vanilla and continue beating until stiff peaks. Chill or use right away.

This recipe is loaded with nuts and raisins but does not have cinnamon making it different from other apple cake recipes. 


Source: The Good Housekeeping Illustrated Cookbook, 1980.

Sunday, April 5, 2015

The Bunny Cake


Easter traditions at my house included colored eggs, candy and a bunny cake. When you are in a family with 7 kids, candy is not hidden in the yard but put equally in baskets. Besides in Minnesota "the yard" could still be covered with snow! Getting candy on Easter was a treat because we didn't often get candy. We had plenty of sugar in the form of cakes, cookies and bars but candy was special. One year I remember going to visit cousins in the Twin Cities where we had an "Egg Hunt." There was more candy than I had ever seen and four decades later I can still remember every detail of that day. Thank you Aunt Betty for that special memory.

Here are the directions so you can add a Bunny Cake to your Easter traditions.  I use a chocolate cake mix  since I love the combination of coconut and chocolate but any flavor will work.

Bunny Cake 
Skill Level: Easy, but messy
Cake:
Chocolate Cake Mix (or flavor of your choice)
Oil
Water
Eggs
1 box instant chocolate pudding (or flavor to match cake)

Make a cake mix according to the directions on the box except add a box of instant pudding powder. Line 2- 9 inch round pans with parchment paper and spray with nonstick spray. Bake as directed on the box, cool 10 minutes then turn over on a cooling rack to finish cooling. 

Cut 1 cake into 2 ears and a bow as shown in the picture.

Freeze the cake to make it easier to frost. I always freeze my cakes because I think cake tastes better when it has been frozen and frosted before it thaws. 
Frosting: (Canned frosting can save time and covered with coconut no one will know) 
1/2 c.
1/2 c. 
Crisco Shortening
Butter (softened at room temperature)
2 tsp.
Vanilla (clear if possible)
4 c.
Powdered Sugar
3 TBSP
Milk or Cream

Beat shortening, butter and vanilla on high for 2 minutes. Add powdered sugar and continuing beating until blended then add milk. Additional milk or powdered sugar can be added so frosting is the right consistency.

Colored coconut: 
Divide 1 cup coconut  between 2 disposable bags. Put 2 drops of food coloring in one bag for the center of the ears. Close and squish the bag until the coconut is colored. Add more coloring until you get the color you like. Do the same with the other bag using green coloring to create the grass. You can use another color of coconut for the bow or use colored frosting so there are some pieces for those who don't like coconut.

To Assemble:
Remove bunny from the freezer and frost the head and sprinkle the sides and top with coconut. Next, frost sides of ears, add coconut and add to the head. When ears are in place, frost the top of ears, put colored in center then finish with white coconut.

Do these same steps for the bow if you are using colored coconut. If you are using frosting, tint your icing and frost the bow either by spreading the frosting or using a star tip and a decorator's bag.

After a few jelly beans, some licorice whiskers and green coconut grass your bunny is complete.
Happy Easter! 

Monday, March 23, 2015

Mocha Bars also known as Blarney Stones


Mocha Bars
To me St. Patrick’s Day isn't about green eggs or corned beef, but rather about Mocha Bars also known as Blarney Stones. For those who have not had the opportunity to indulge in this delightful combination of flavors, let me explain. Mocha Bars have nothing to do with coffee or chocolate.  I have no idea where the name originated, but it is white cake covered on all sides with frosting then rolled in crushed salted peanuts. This sweet and salty combination is amazing and worth the sticky fingers. Don’t be tempted to make the cake from scratch. A box of white cake mix made in a 9 by 13 inch pan is easier, cheaper and tastes better since it isn't as rich. The frosting has to be homemade though using shortening instead of butter for the best flavor combination.


Mocha Bars a.k.a. Blarney Stones
Skill Level: Easy, but a little messy
Cake:
White Cake Mix
Oil
Water
Eggs
12 oz. Dry Roasted Peanuts finely chopped
Optional: Sprinkles and coconut

Make a white cake mix according to the directions on the box. Line a 9 x 13 inch pan with parchment paper and spray with nonstick spray. Bake as directed on the box, cool 10 minutes then turn over on a cooling rack to finish cooling. When cool, cut into squares and put in the freezer until frozen.


Frosting:
1 c.
Crisco Shortening
2 tsp.
Vanilla (clear if possible)
4 c.
Powdered Sugar
3 TBSP
Milk or Cream

Beat shortening and vanilla with mixer until smooth. Add powdered sugar and beat on low then add milk a little at a time until it is a medium consistency. It should hold its shape but is still easy to spread.

Put crushed peanuts in a shallow dish. If you have someone who doesn’t like or cannot have peanuts you can roll in sprinkles or coconut instead. Better yet, make some of each.


Take a cake square from the freezer and quickly frost the 4 sides, then roll in peanuts, sprinkles or coconut pressing lightly. Finally, frost and press the top side into peanuts, sprinkles or coconut. Each square will be frosted on all sides except the bottom. Repeat until each square is frosted and rolled. It is important that the cake is frozen so you can handle it and that you roll it right away before the frosting freezes and the toppings don’t stick.

Source: Created from memories of those at the Red Owl Grocery Store.